
There are a million ways to make beer. Of course there are some real rules to follow, but everyone seems to have their own technique for the gray area. In making my beer I’ve asked many questions and have been working on homing in on my preferred technique. Below is my plan for making a 5G batch of beer with specialty grains which I imagine I’ll continually tweak. Feel free to offer suggestions that you feel would be helpful in my beer making process and hopefully this helps some new brewers as well.
This attached excel spreadsheet is something that I use to track when I should be doing things. You can see my previous and current beers in each tab. I typically print this before I begin and make notes as I go along to keep improving my process.
Schedule spreadsheet (some browsers show this link as stricken out, but it works. To use download file and use in excel. Most browsers will default to showing a read only version from Google.)
Day -9.5 to -2: Yeast Starter
After one really slow starting beer, I discovered that my yeast counts probably were low. Turns out they were probably always low. This step should ensure that the proper amount of yeast is used during the brew day. Note, if using dry yeast the stater is made on brew day rather than ahead of time.
- Read the full process on this page.
Day -1: Prep
Since time is always limited, especially with a little one, I like to get a few things ready for the brew day early. You can certainly do everything from this step on the brew day. I haven’t figured how to do water quality control yet, so for now I buy my water. I’ll look into this more in the future to help reduce costs.
- Clean stainless steel pot
- 7 gallons of water.
- Put 3G in the fridge to help chill the wort after the boil.
- 10lb bag of ice to circulate through the wort chiller.(or start saving ice from the ice maker and freeze empty 2L for bottles)
- Propane.
- Check to make sure you have all the ingredients.
- sanitizer
- specialty grains
- malt extract
- hops and other additives
- Setup drill for chilling and aerating.
Day 0: Brew Day
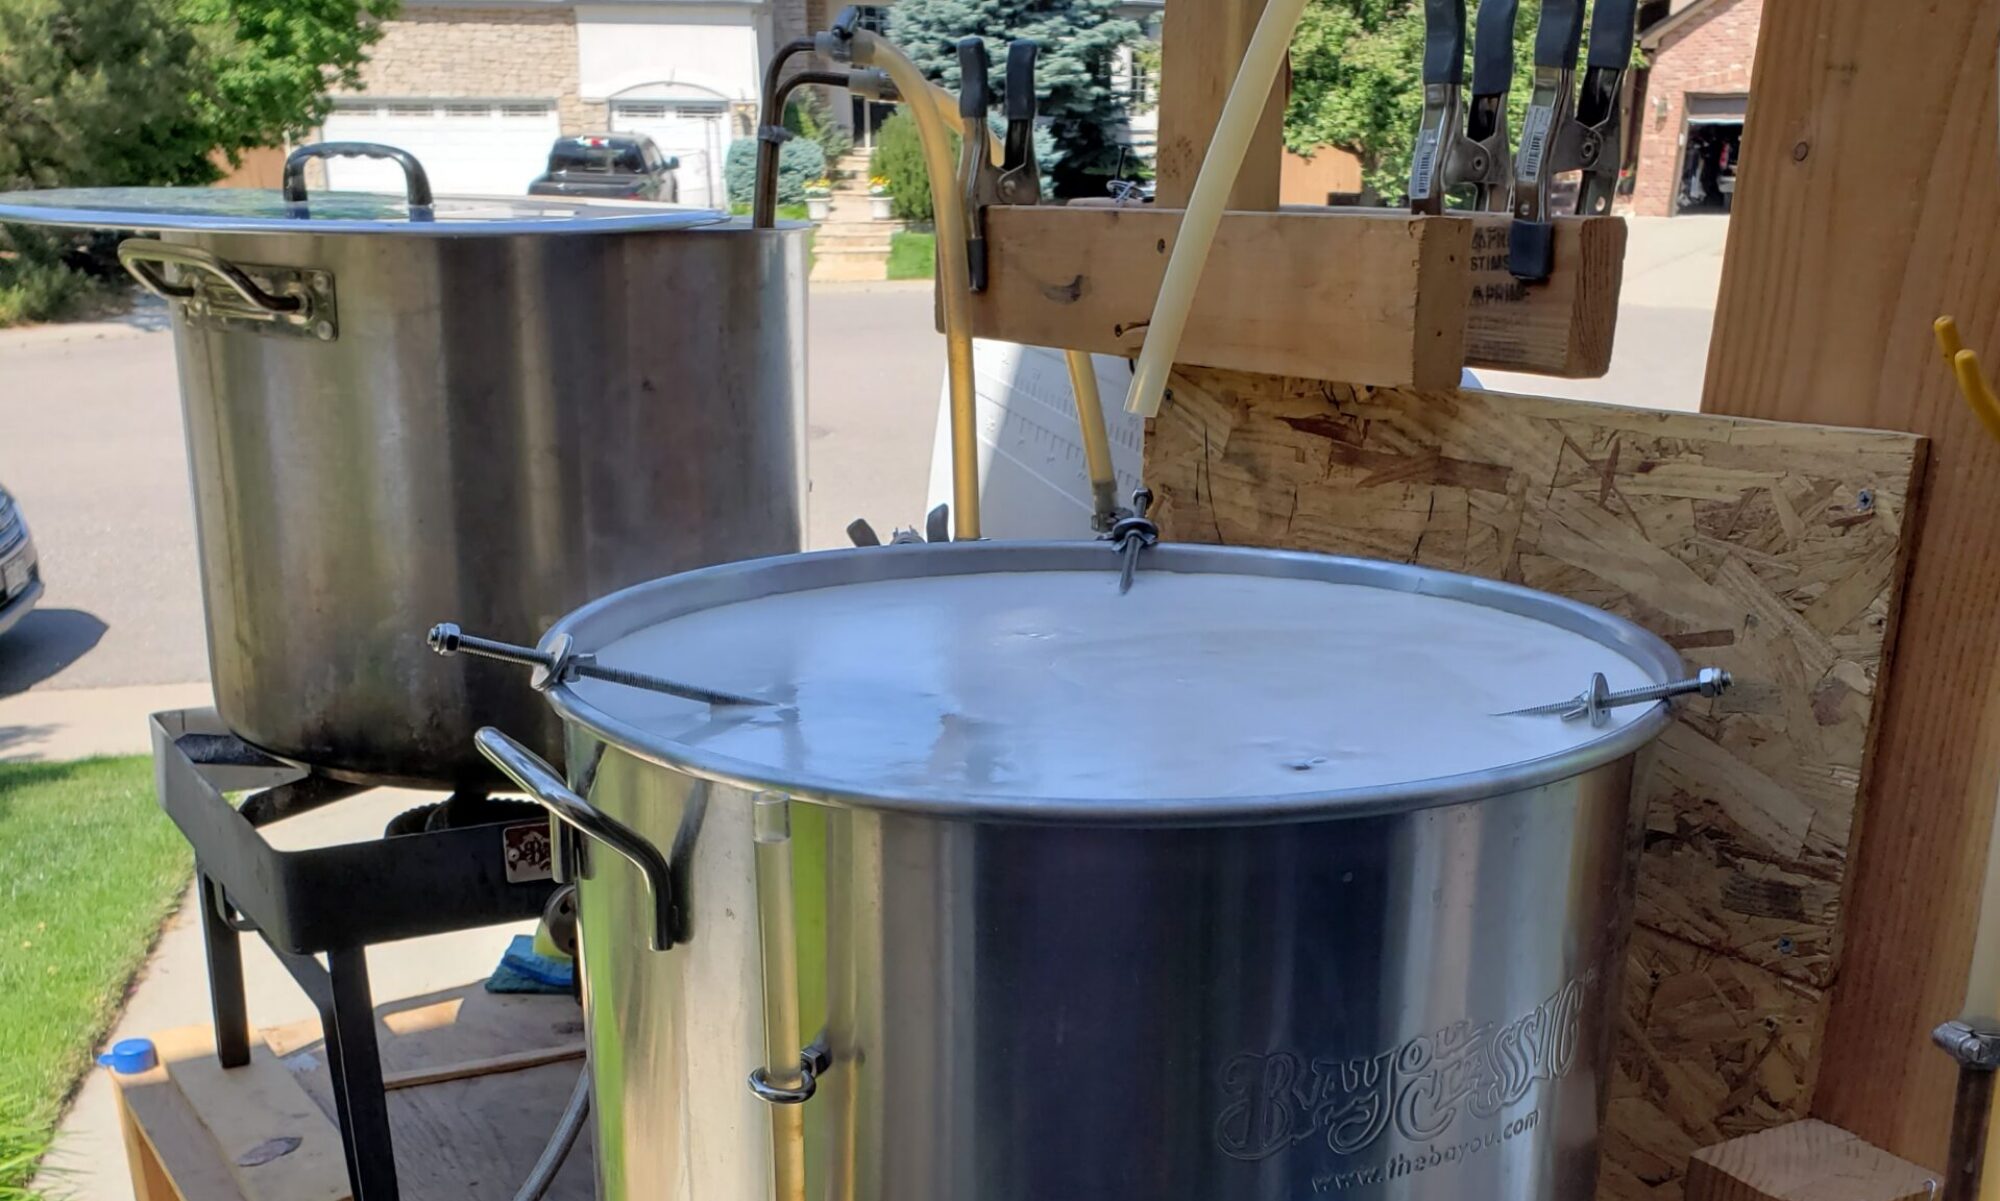
Getting going
I do the following steps in this order to be as efficient with time as possible. I bought a turkey fryer from Bass Pro shop that came with a 7.5G stainless steel pot which works pretty good out of the box. I took some wire and locked the timer down to override the safety feature so that it doesn’t turn off in the middle of brewing.
- Double check to make sure you have all the ingredients
- See the items from day -1.
- Take yeast out of the fridge and (optional) set it in a tub of room temperature (~70) water, you want it to have some time to warm up.
- Rinse out the stainless steel pot and start heating the water for stepping.
- Place the thermometer in the pot.
- Place the steeping grains in the grain bags.
- Start cleaning all the equipment that will go in the wort after boiling.
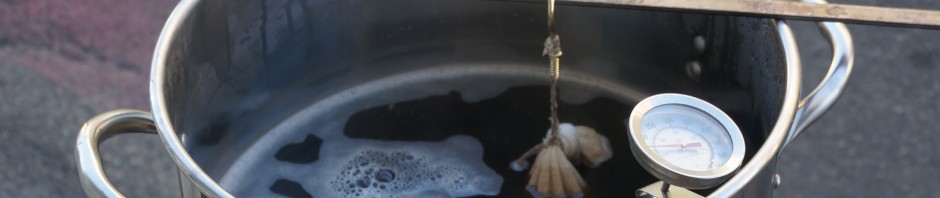
Steeping
Steeping is very simple, but for me it needs constant attention to make sure the temperature stays within the right range. I use a metal cross beam and hang the steeping bags from it so that it doesn’t touch the sides or bottom. The largest controversy is when the steeping is done to squeeze the bag or not. It seems that likely it won’t make a difference so I’ve opted for a good squeeze to get some of the water out rather than waiting for it to all drip out, but not so much to get every ounce of water.
- Wait for the water to reach 155-160 degrees. Do not go over 165 degrees as this will burn the grain and produce off flavors.
- Place the grain in the pot. Try to avoid having the bags touch the side or bottom, but as long as they move around things should be fine. I cheat and hang them from the middle.
- Watch the temperature as it will fluctuate for a bit. Then after a short while cut the heat as it will stay within the right temp for a while.
- Occasionally bob the grain bags.
- repeat 3 & 4 for 30 minutes.
- If hop schedule calls for FWH, add at 30 mins remaining
- When done lift the bags out of the water and allow them to drain for a bit.
- The give them a good squeeze to get a bit of the remaining water.
Adding Malt
- Turn the heat off, if it isn’t off already.
- Add the malt while mixing vigorously to avoid burning on the bottom.
- Once the malt is mixed in turn on heat (watch for boil over). I find that after a short while (the hot break) the risk of boil over goes away.
- The boil timer starts when the pot is back to a boil. Maintain a vigorous boil throughout the boil time.
- Replace the water that the yeast is sitting in with more 70 degF water.
Hop schedule
Follow the hop schedule which starts after the wort begins boiling (not when the malt is added)
- Place the hops in a hop bag.
- or just throw them in without it and do a bit more work keeping the trub out.
- Throw it in the pot at the right time.
- Make sure it is mixing around well.
- Sometimes I hold the bag under water to get the air out.
Hop Addition Times
- FWH (First Wort Hops): Following first runnings or 30 min remaining when steeping (before boiling)
- XX Minutes: Added with XX minutes remaining in the boil
- Flame out: Following the end of the boil time. Heat turned off
- Whirlpool: When the temp has dropped to 200. Let naturally cool from here ideal to stay in range of 200-190
- Hop Stand: When the temperature has dropped to 175F
(Optional) Fining Addition
Adding irish moss or whirlfloc can help produce clear beer.
- For irish moss
- add 1tsp to 1/2 cup warm water
- Soak for 15+ minutes
- with 15 mins left in the boil add irish moss or whirflloc.
Chilling
Chill as quick as possible to avoid any off flavors being generated. I use a copper wort chiller and attach a drill pump or sump pump to it. I then circulate ice water from a cooler through it.
- Chill the water down to ~70 degrees as fast a possible.
- Add cold water to get to the proper batch size (5 or 5.25 G apps usually) or add much add your pot/kettle can fit.
- Circulate through the wort chiller hose temp water until the wort is 90 degF.
- Then use ice bath water to get it down to the final temp.
- Whirpool (or stir) while chilling
Start Temp (Flame out) _______:______________________
Temp @ 200F (Whirlpool)_______:______________________
Temp @ 175F (Hop Stand)_______:______________________
Temp @ 140F (End of tepid range) _______:________________
Final Temp @______ : ______________________
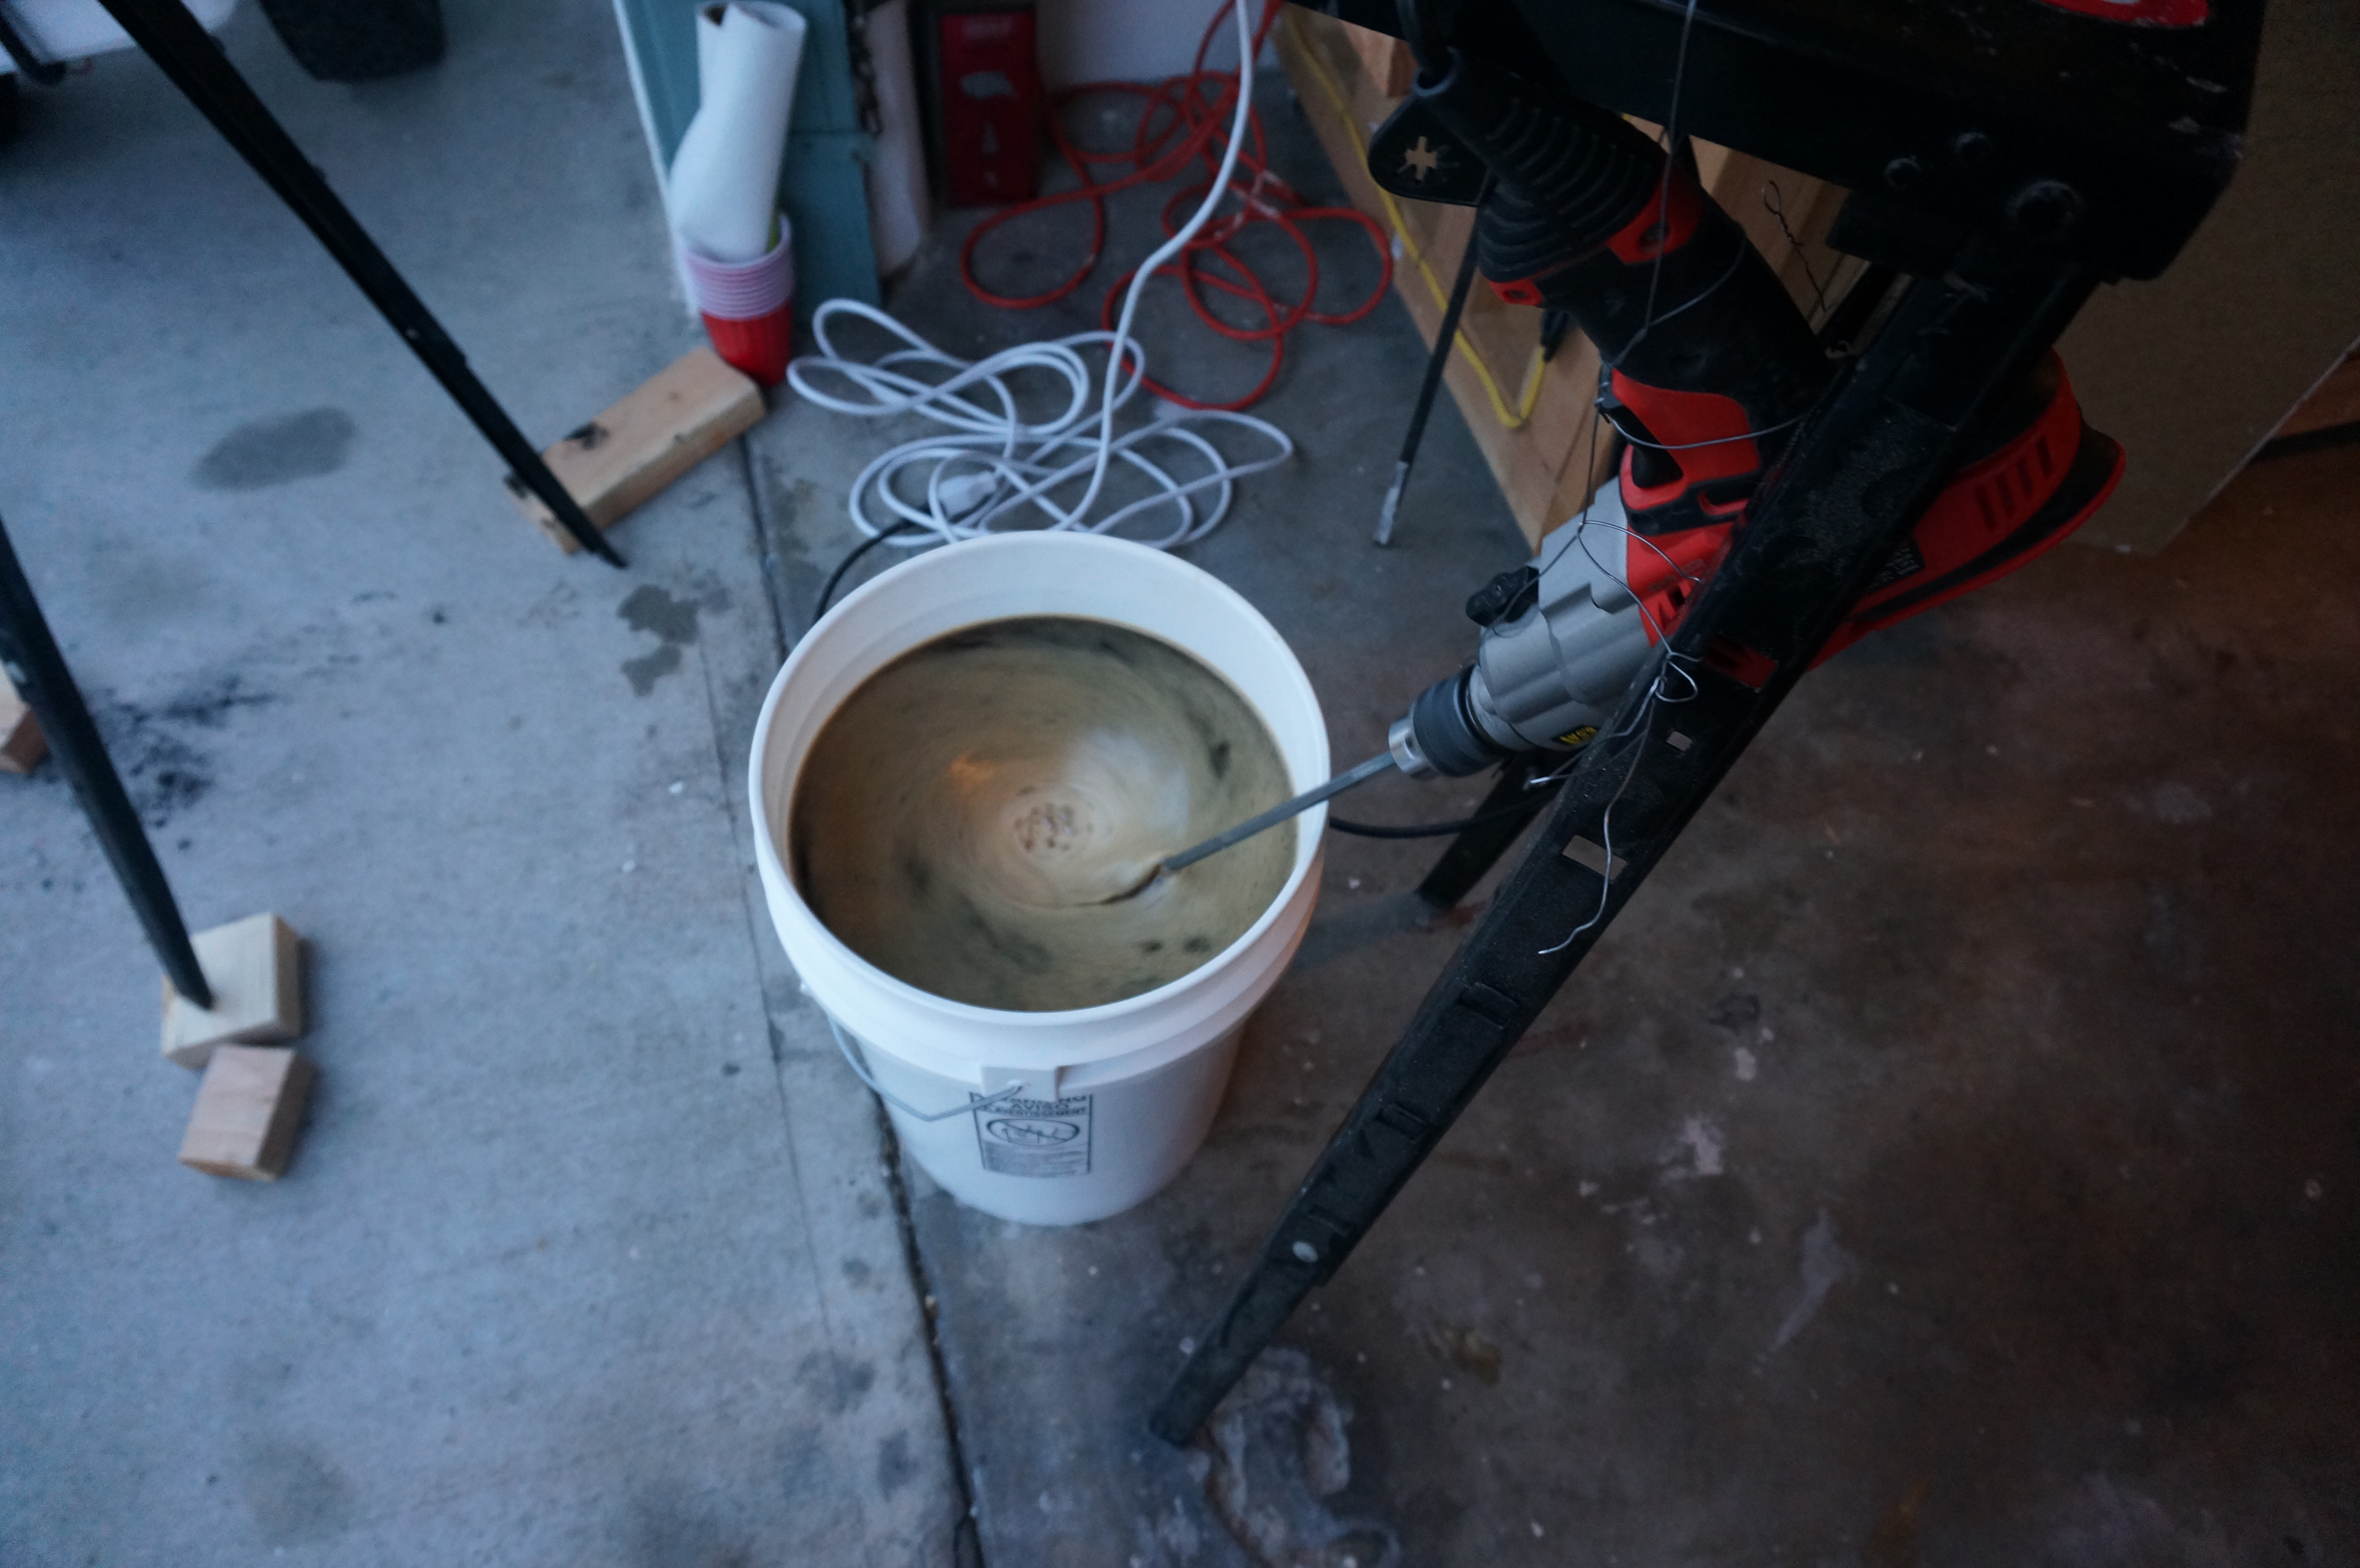
Transfer to primary fermentation bucket
I use a drill paint mixer to whirlpool the wort to leave behind some of the trub. Then I use and auto-siphon to transfer it to the primary fermentation tank which in my case is a 6.5G plastic bucket. I’m going to cold crash later in the process so I’m not so worried about the trub, but this is simple to do and may help a bit.
- Wait for about 20 mins for the trub to gather in the middle of the bucket.
- With the filter around the output end of the tube, auto-siphon from the side of the pot to primary fermentation tank (or use the valve).
- Add the cold water to reach the 5 gallon line (or in a few recipes 5.25G).
- Do not add water if doing an all-grain.
- Mix in the water for 30s.
Starting gravity measurement
- Place the thermometer in the wort.
- Place the hydrometer in the wort.
- Spin the hydrometer to get any bubbles of of it.
- Take a measurement from the hydrometer and the thermometer.
- Take a measurement.
- Repeat 2-5 a few times to make sure you got a real measurement.
Aerating
Aerate prior to pitching (adding) the yeast as this is very important to ensuring the yeast takes well. Aerate for 5-10 mins. I use a drill paint mixer otherwise stir vigorously.
Pitching Yeast
Dry yeast: after rehydrating the yeast (see the yeast starter page for more info on this) just pour the whole liquid in.
Liquid yeast starer should be good to go if you take it out at the start and leave it in water.
- If using a yeast starter, pour out most of the top liquid.
- Pour some of the wort into the yeast starter and swirl it around really good to break it up and off the bottom.
- Add the yeast to the wort.
- Stir/mix in the yeast. This probably is not needed but I feel better doing it.
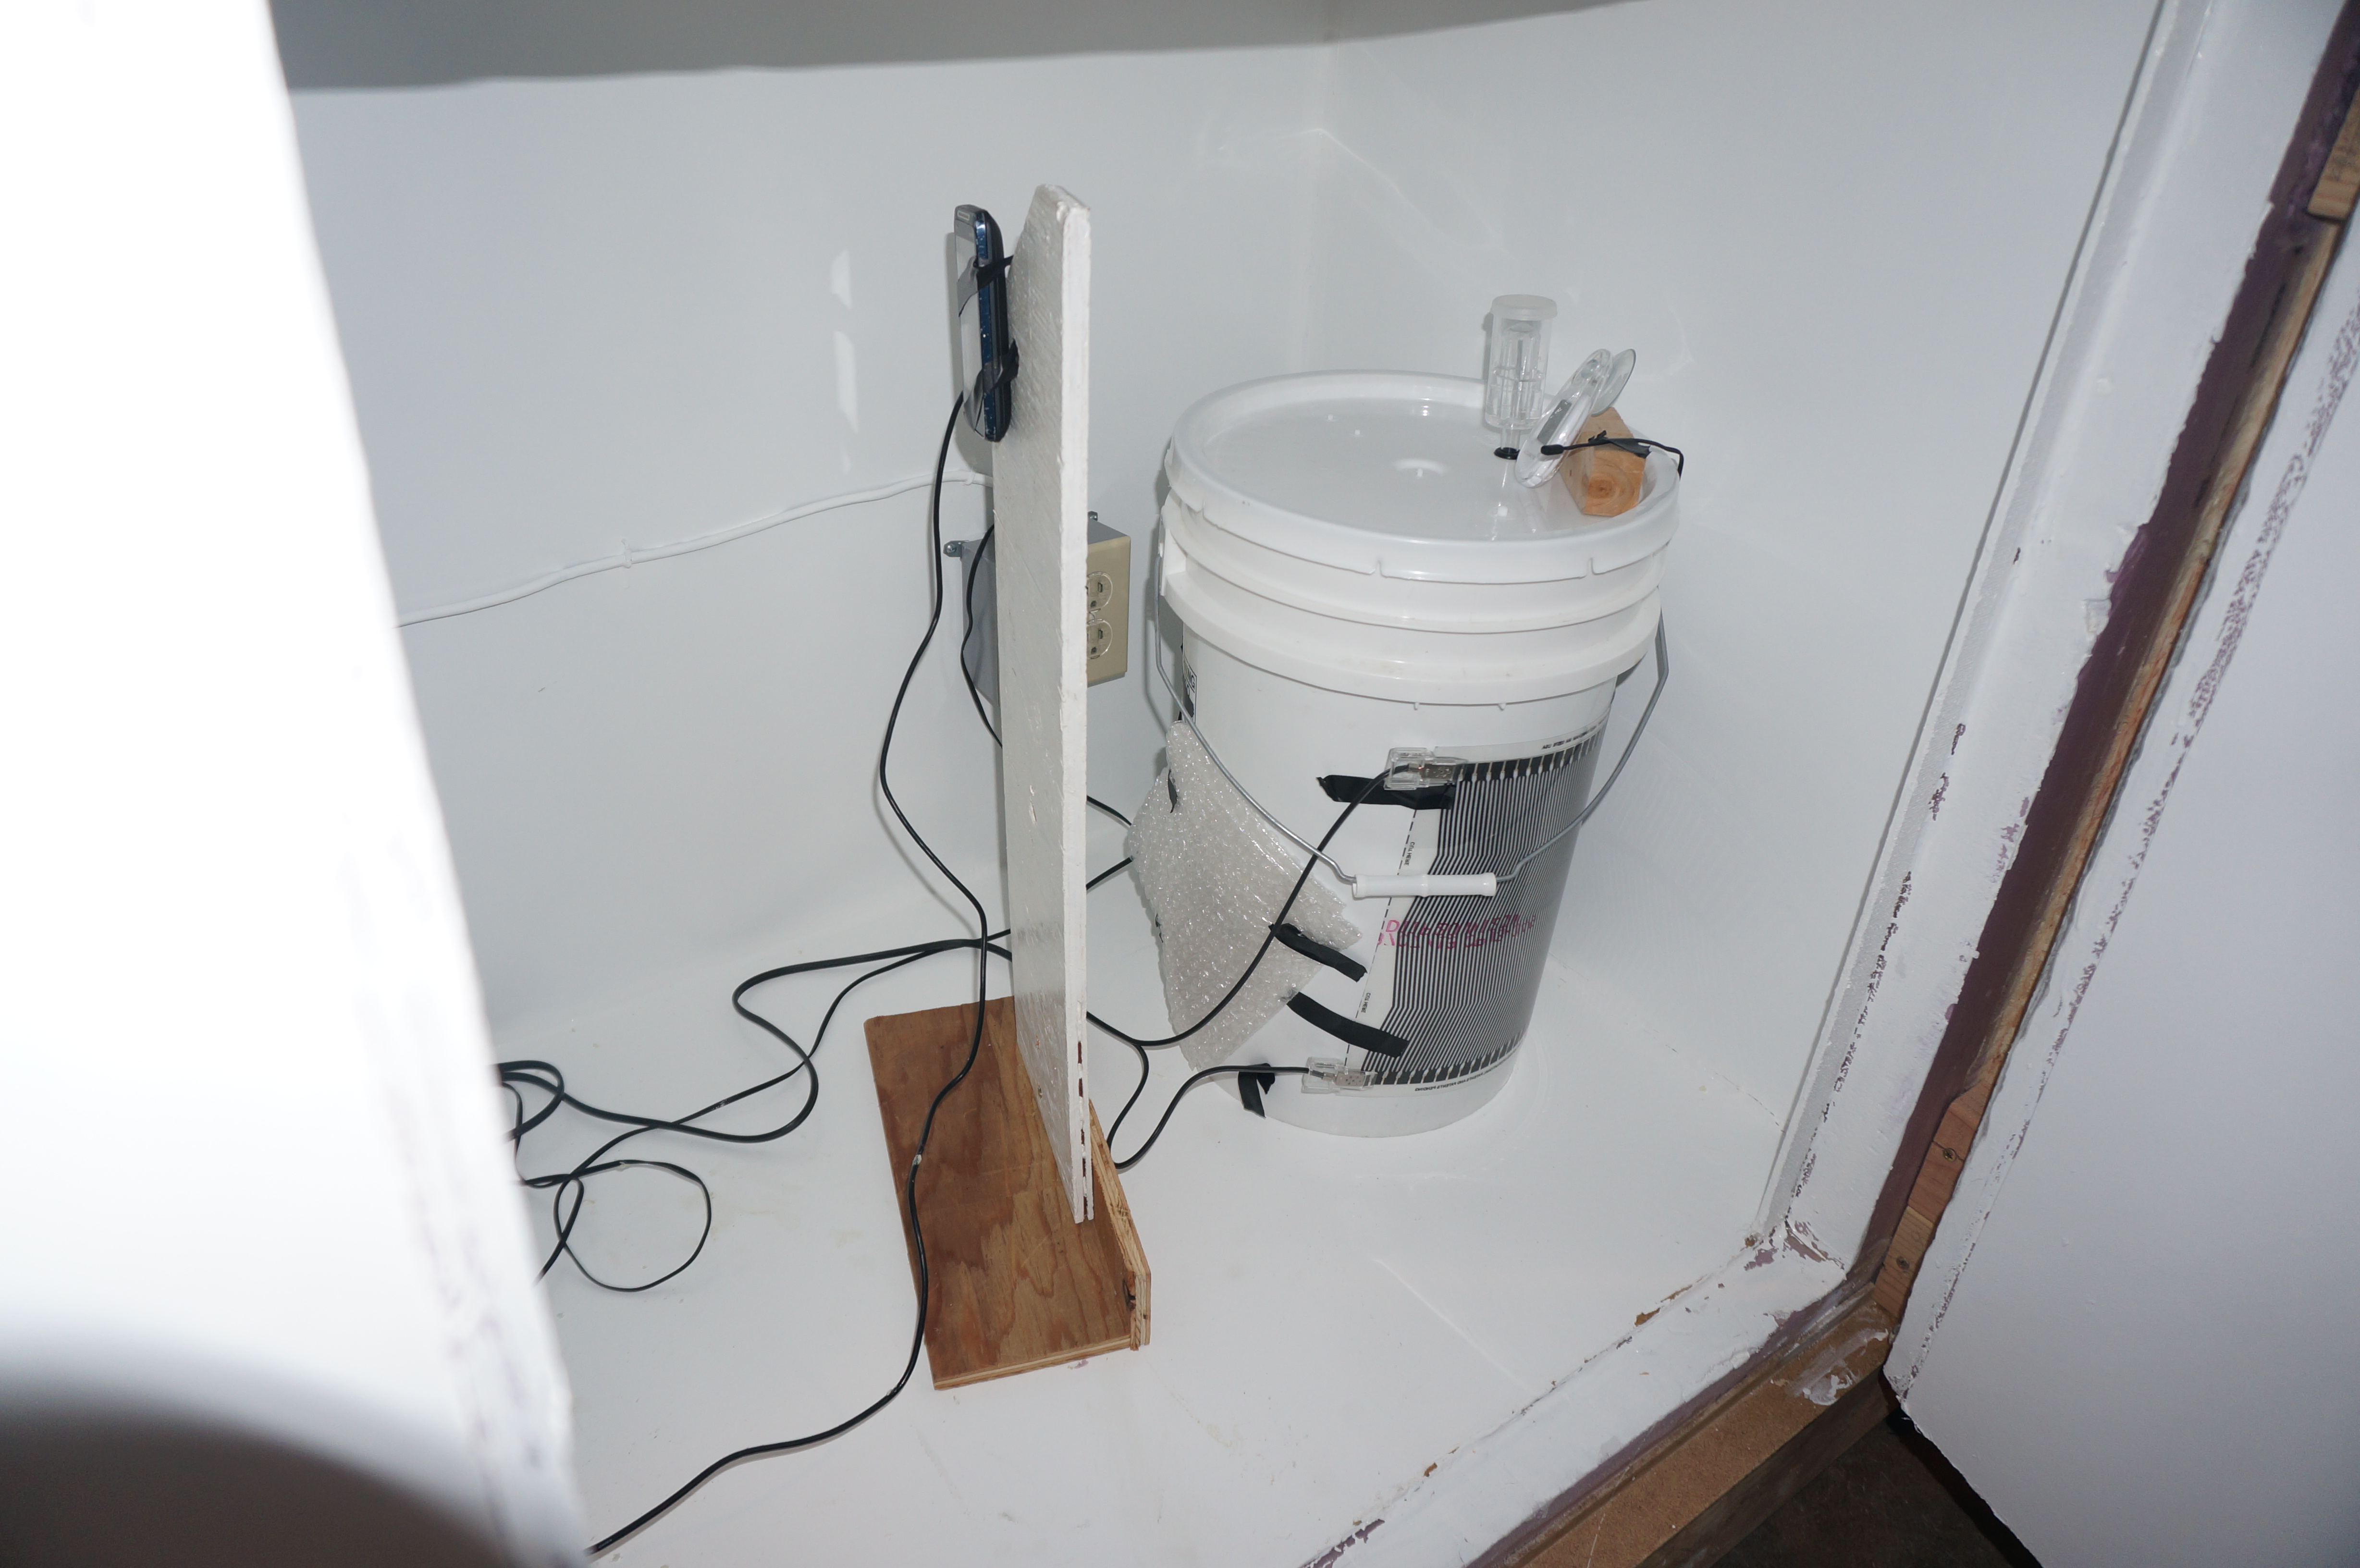
Primary Fermentation Storage
- Add the lid.
- Add the blow off valve. I use some vodka for the liquid.
- Place in location where it is dark and will be at the right temperature for the yeast.
- The temperature will vary by the yeast, but typically 65-70 is good if you don’t know what to do.
- I built a fermentation chamber for this and set it for 19.5 +/- 2.0 or whatever is recommended for for the yeast.
- Setup the webcam.
Clean up
- Clean everything and leave to dry.
Day 1: Clean Up
Put away all the brewing equipment now that it is dry.
Day 11: Cold Crashing
Fermentation is complete when the gravity hasn’t changed for 3 days which is typically 6-10 days. I usually brew on Saturday or Sunday so I just wait until Wednesday of the next week (day 10) before I start cold crashing which is usually plenty of time. There will still be plenty of yeast for bottle conditioning later.
- Begin cold crashing after fermentation is complete.
- Make sure you have an S-airlock (or there is some other methods that can be used) because the crashing will cause the bucket to suck in.
- Lower the temperature to under 40 for 2-3 days in primary.
Day 14: Secondary Fermentation
There is a lot of discussions whether this should be done or not, I’ve chosen to do it. When transferring to the secondary you want to expose the beer to as little oxygen as possible. Be gentle. When done move on to secondary and let it rise to the desired temperature. The amount of time to leave in the secondary is quite variable. I’ve read that that strong beers, stouts, and porters should be left for 6-12 months, whereas pales and such don’t need as long. For long durations in a secondary I will use a glass carboy, but for shorter durations in the secondary I’ve just used a plastic bucket. The days below assume a “normal” 3 weeks in the secondary or you can adjust using the -days to bottling for longer secondary times.
Transfer to secondary
- Clean the Secondary fermentation bucket/carboy, nylon filter bag, twine, thermometer, and hydrometer.
- Place the primary fermentation higher than the secondary.
- Take the lid off and take a gravity and temperature reading.
- If the gravity is not where it should be, put the lid back on and wait longer.
- If fermentation has stopped, but the gravity is still too high start looking for stuck fermentation solutions.
- Place a filter bag, fine mesh nylon works good, around the outlet of the tubing and tie on with twine.
- Use the auto-siphon to for the transfer. Don’t suck up the bottom trub.
- Place a cap/lid on the bucket/carboy
- Add on an S-airlock (for cold crashing in the future).
- Do yeast washing (TBD)
- Clean up the fermenting bucket and everything else.
Day 24 (-12 to bottling): Dry hopping
I’ve dry hopped once and haven’t tasted the results yet, but here is my process for now. My process is based on many foum posts, and two articles from Russian River and Stone . Russian river appears to recommend a much longer hopping period than Stone so I’ve split the difference.
- Set fermentation temp to 68 degrees (19.5 +/-1.0).
- Add the hops directly to the fermenter (carboy or bucket).
Day 30 (-6 to bottling) Cold Crashing Part 2
I don’t really think the cold crash is entirely necessary a second time, but I’ve opted to use gelatin as my clearing agent and it performs better when the beer is cold. So I’m cold crashing for a second time just like the first time.
Day 32 (-4 to bottling): Clearing Agent
I’ve selected to use gelatin and Irish moss (on brew day). From what I’ve read, and my limited experience, the gelatin has no affect on the beer taste or smell and is very effective at removing the particles.
Using Gelatin
There are two ways to go about this. Boil the water then add the gelatin or microwave the water with gelatin. I’ve opt’d for the later and have based my process on this article.
- If possible, cold crash the beer for 2-3 days prior to adding the yeast for best results
- Get a microwave-safe glass/pyrex cup
- Measure out 2/3 cup cold water.
- If using tap water, add campden (1/8 table)
- Add 1.25 teaspoon per 5G of gelatin and stir the solution.
- Wait 20 minutes to let the gelatin bloom
- Starsan the thermometer probe
- Place the water/gelatin mixture in the microwave, and begin to heat it 15-30 seconds at a time, stopping to stir the solution and check the temperature. As it heats up, you’ll notice the gelatin will begin to dissolve.
- The goal is to heat the gelatin to 150F, but not much over. If it climbs to 155 or so, that’s fine, but I’d be hesitant to go much over 170F. We’re not trying to make jello, rather just trying to pasteurize the solution.
- Wait 15 minutes to allow for the gelatin to pasteurize.
- Give the mixture one last stir and dump it straight into your beer.
- Starsan the mixing spoon.
- Gently stir the fermenter or keg.
- Don’t make any ripples or bubbles, we don’t want to add oxygen to the beer.
- If you have the ability, purge the headspace with CO2 to remove any oxygen that got mixed in.
- Place the lid and stopper back on the fermentor
- Leave it in the fermentation chamber.
Day 34 (-1 to bottling): Bottling Prep
Block of time are hard to come by for me so I’ve tried to do some of the prep work for bottling the previous day.
- Clean the bottles. It’s okay (i.e. a low risk to contamination) to clean a day early and let them dry.
- Fill the bottling bucket with Starsan solution
- Place the thing needed for bottling in the bucket
- bottling wand and hose, stir spoon, hydrometer, thermometer, straining bag, auto-siphon
- Make sure you have enough bottle caps.
Labels
I use some generic Office Depot 3/4″ circular labels (837-396) to stick to the top. This way I don’t have to scrub the bottle after I use it. I have found that the template is off. For now my labels are sized to be smaller than the circle pattern.
On the printer, I need to select the paper size as “Hagaki 100 x 148mm” and the Media Type as “Hagaki A”. Get the label ready for everything but the ABV. Once the final measurement is taken add the ABV and print.
Day 35: Bottling
The beer will be cold at this point which will affect the carbonation a bit. First a little less sugar might be needed since there will be more C02 trapped in the beer. It seems that most of the C02 is from fermenting and the cold crash will have only a minor affect on the C02 levels. Secondly, the carbonating may take a week longer than “normal”
Bottling Yeast
Most of the time there is enough yeast after cold crashing that additional bottling yeast isn’t necessary. However, when bottling aged beers (6+ months) or high gravity beers it is best to error on the side of caution and add bottling yeast. I prefer to use CBC-1 Cask & Bottle Conditioning Yeast.
- Use 2-3g of CBC-1 per 5G
- I find it easier and not too expensive to just use 1/2 of a packet (~5.5g)
- Follow the Re-hydrating Dry Yeast instructions on the Making a Yeast Starter Page
Priming & Capping: Part 1
- Calculate the amount of sugar needed, if not provided in a kit. Use the fermentation temp.
- Boil 1-2 cups of water.
- Stir in the priming sugar.
- Cover the pan until ready to add to the bottling bucket.
Transfer and Final gravity measurement
Transfer from secondary to bottling bucket. Be careful not to agitate the gelatin on the bottom and try to limit the exposure to oxygen. Take a final gravity sample.
- Place the straining bag over the output of auto-siphon.
- Gently transfer the beer from the fermenter to the bottling bucket.
- Place the thermometer and the hydrometer in the bucket.
- Spin the hydrometer to get any bubbles of of it.
- Take a final gravity (FG) measurement.
- Record the temperature.
- Repeat 2-5 a few times to make sure you got a real measurement.
- Calculate the alcohol percentage.
- I’ve added the formulas to my excel sheet (see the link at the top).
- Otherwise, I use an app (ABV Calculator for android) so I don’t have to worry about the formulas.
Priming & Capping: Part 2
The priming sugar will throw off any hydrometer reading. Make sure you are done before proceeding.
- Add the priming sugar to the bottling bucket.
- Gently stir to beer to mix in the priming sugar well.
- Bottle and cap.
- Print out labels and attach them.
- Leave at 70 degrees in a dark area.
Day 56+: Drinking Time
The time to bottle conditioning varies quite a bit, but the “normal” way is to wait at least 3 weeks. Its said that the long the better the beer will turn out, but I imagine just like secondary fermentation this varies with the beer.

Updates
- (11/13/2013) Initial Post.
- (12/3/2013) Adding a second cold crash prior to adding the gelatin as this makes the gelatin more effective.
- (12/5/2013) Added my spreadsheet that follows my brewing plan.
- (12/30/2013) Added making a yeast starter to my process.
- (1/3/2013) Added squeezing the steeping bag and placing yeast starter in water.
- (3/9/2014) Changed how I do gelatin, Updated dry hopping now that I’ve done it once, days for completion.
- (4/17/2014) Several updates all around for a slightly more refined process.