
The yeast is like Goldilocks and the three bears. You don’t want too much or too little, you want just the right amount. Too little yeast and you won’t get the proper fermentation. Too much and you might end up with a yeasty flavor (though this seems harder and more rare to do). Getting the to the right amount depends on several factors that many people have spent time thinking about. I recommend using the links below rather than trying to re-create their work and when in doubt it is better to slightly over pitch (over add yeast) than under pitch. One thing to note is that the amount of starter and steps needed is significantly lower with a stir plate and I highly recommend one.
The equipment I use
- Erlenmeyer flask
- Flask foam stopper
- use tinfoil as an alternative
- Thermometer (same one I use to monitor the boil on brew day)
- Light DME
- Digital scale
- If no scale estimate 1.0 oz of DME is ~0.21 cups
- Yeast
- Fermcap-S (anti-foaming agent)
- Fermax yeast nutrient
- Measuring cup
- Stove
- Stir plate and stir bar
- Star San sanitizer
- funnel
- Large pot (if making over 1.5L starter
Optional or substitute equipment
- flask -> glass or plastic container(s) to keep the chilled wort in when a larger starter is needed
- If the starter is larger than a single container, then make the starter as noted below and when done simply split the starter into two or more containers. Make sure the yeast is fully distributed in the pot before separating by stirring or swirling really well
Yeast Starter from liquid yeast vial
My process steps are largely derived from Yeast Cal’s “The Care and Feeding of Your Yeast” document with my modified plan, notes, and resolved questions added in.
Determine what to do
Before you go about making the starter first you need to figure out what you are going to do. The three sources for yeast calculations that largely derive their information from similar sources: Brewer’s Friend Yeast Pitching Calculator, Mr. Malty, and Yeast Cal. So far I think I like using Brewer’s Friend as it has an extra knob to adjust the Target Pitch Rate for high gravity beers. Below are my steps for making my yeast starter.
- Get the needed information
- Estimated starting/original gravity of the wort (O.G.)
- Liquid and Dry Yeast
- The viable date for the yeast which is: Date = (Best Before Date) – (4 months) – (days until making starter)
- On White Lab vials take the best before date and subtract 4 months.
- Also, for planning subtract out the days until you plan to make the starter to get the right yeast count for they day you start rather than the day you make the inputs to the tools.
- The viable date for the yeast which is: Date = (Best Before Date) – (4 months) – (days until making starter)
- Slurry
- Use Mr. Malty YeastCal to get the viability of the your slurry
- Ignore everything else
- Choose the Re-pitching from Slurry
- The date = day yeast pitched + 7 days ( time fermentation stopped) – (days until making starter)
- Calculate the amount of yeast that you have
- Yeast Amount (billions of cells) = Amount of yeast (mL) * Yeast Concentration (b/mL) * [ Viability (%) – non-slurry (%)]
- Amount of yeast (mL): this is the packed down amount after several days of sitting in a jar
- Yeast Concentration (b/mL): You can see the ranges from Mr. Malty. Stick with the default of 2.4 (b/mL)
- Yeast Concentration (b/mL): You can see the ranges from Mr. Malty. I go with 10%
- Yeast Amount (billions of cells) = Amount of yeast (mL) * Yeast Concentration (b/mL) * [ Viability (%) – non-slurry (%)]
- Now on Brewer’s Friend
- Slurry Amount (Liters) will equal the Yeast Amount (billions of cells) / 1000
- For example if you have 332 billion cells then enter 0.322
- Slurry Density will be set to 1
- Slurry Amount (Liters) will equal the Yeast Amount (billions of cells) / 1000
- Use Mr. Malty YeastCal to get the viability of the your slurry
- Plug the inputs into the calculator of your choice to determine the starter size and steps. From this step you should get the number of steps, the size (amount of water) and the amount of DME for each step.
- For the starting gravity wort use 1.037.
- Set the Target Pitching Rates
- Brewer’s Friend: Use “Pro Brewer 0.75” for OGs below 1.060 and “Pro Brewer 1.00” for OGs above 1.060
- Yeast Calc: Use Ale for OGs below 1.060 or Hybrid for OGs above 1.060
- Add steps to get to the needed yeast count.
- If using a stir plate, Use “Braukaiser – Stirplate” instead of “White -Stir Plate”
- Step size should be limited. Mr Malty says, ” Five to ten times the size of the prior step is considered correct.”, though I imagine a smaller step is okay too.
- Note this is the ratio is size. If the first step is 1L a 5x step would be 5L on the second step.
- Remember it is better to go slightly higher on the yeast count than too low.
- Check to make sure you have enough DME or go out and get some more.
First Step
This step and each following step will take 72 hours from start to finish
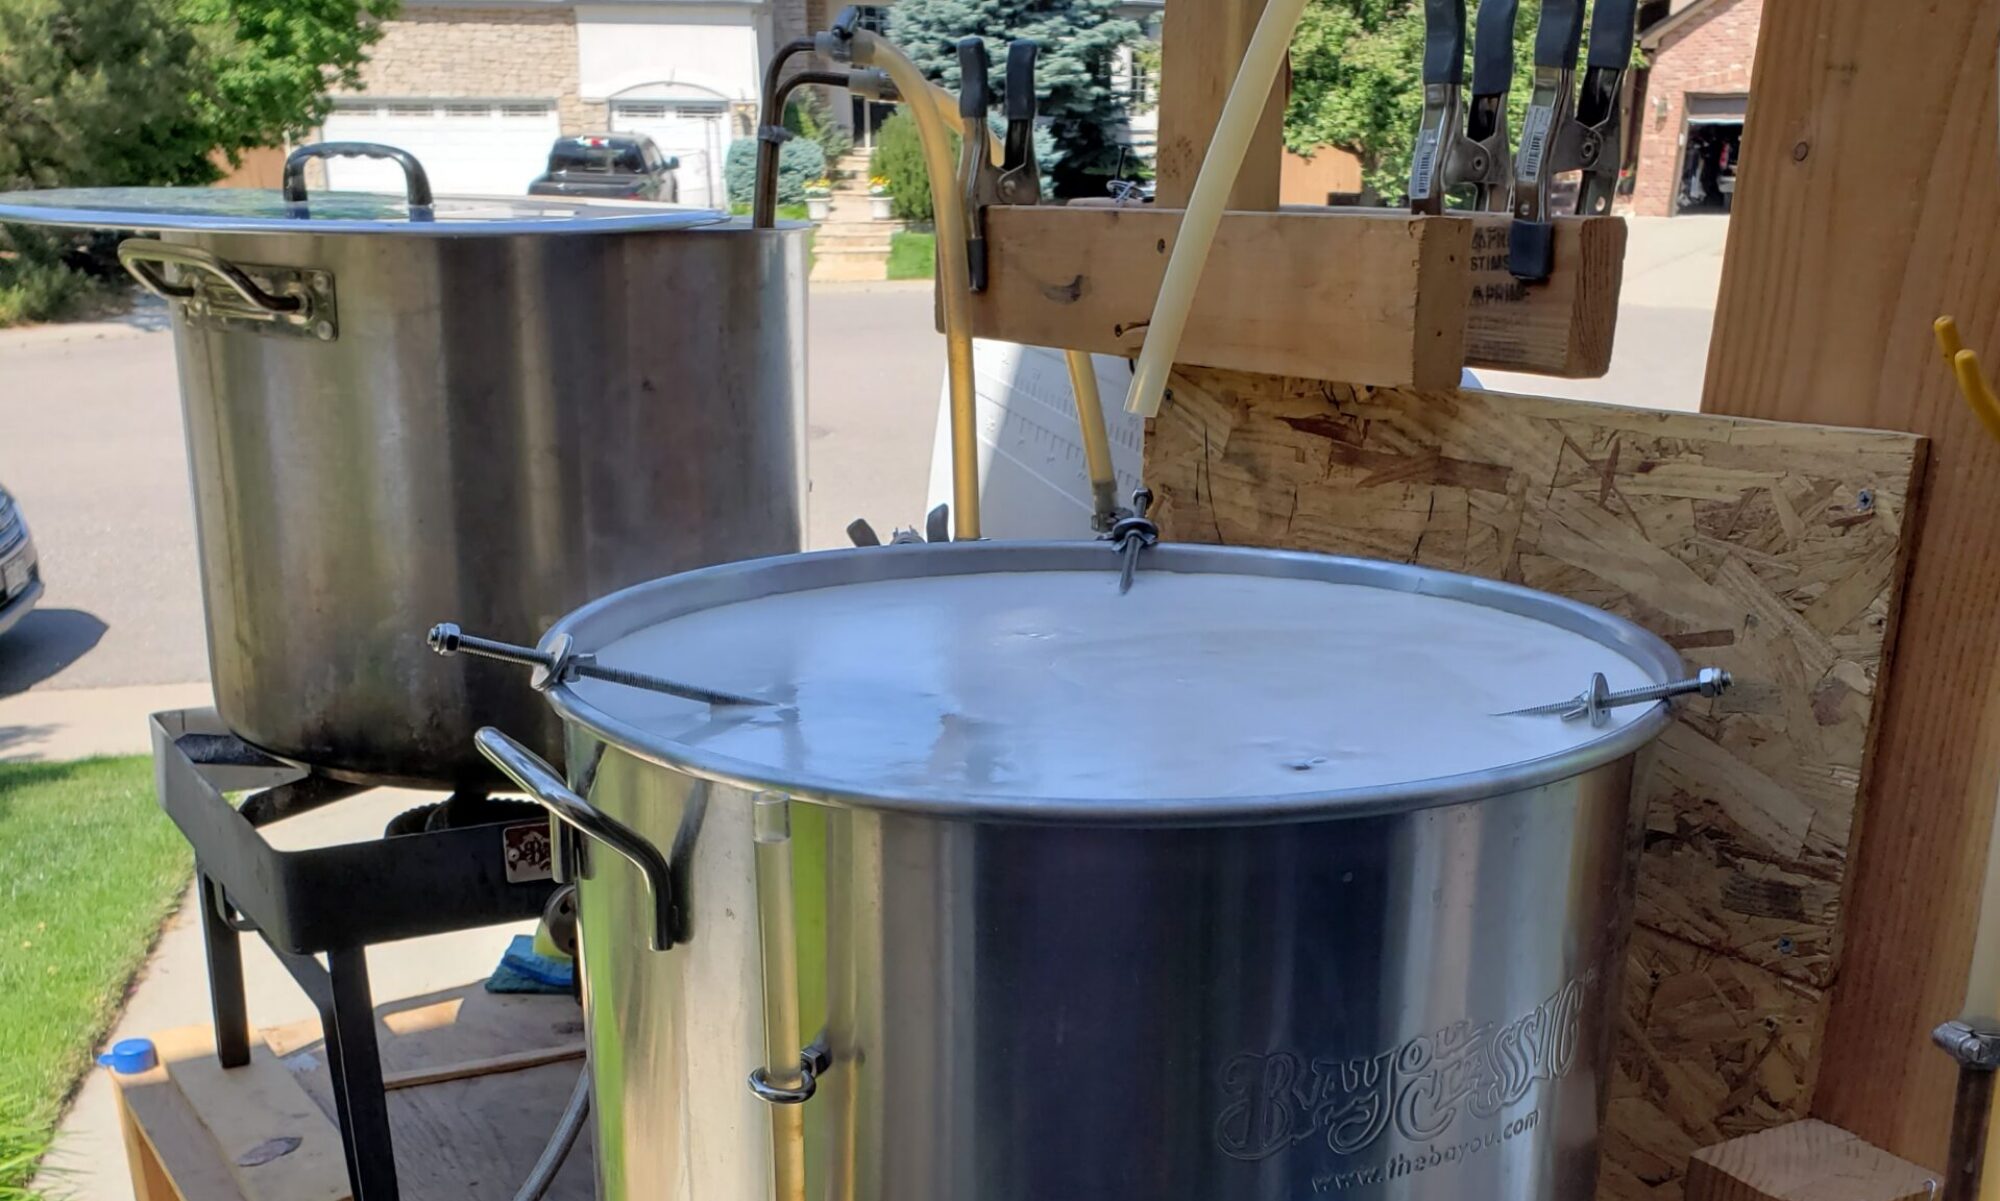
If the starter size is less than 1.5L (for a 2L flask) then use the flask. Otherwise do steps 2-10 in a pot
- Take the yeast out of the fridge to allow it to warm up
- Sanitize the flask and thermometer
- This really isn’t needed, but I prefer to be extra safe.
- Add the water the the flask
- Add the Campden tablet (1 tblt per 20G), if needed
- Heat the water to about 160 degrees
- Measure out the DME into a measuring cup
- Use the tare function on the scale to get the right amount
- When the water is hot pour some water into the measuring cup and then pour it back into the flask. Repeat until all the DME is out of the measuring cup.
- (Optional) Add the yeast nutrient to the flask
- Fermax is 1 tsp per 1 gallon, adjust appropriately
- Add 3 drops of Fermcap-S (anti-foaming agent)
- This is somewhat optional, but I didn’t do this the first time and had a huge mess to clean up
- Place the stir bar into the flask
- If the starter is going to be split into several flasks or containers then place the other stir bars in the flask now too
- Boil the wort for 15 minutes
- If a pot was used, then at this point in time pour the wort into the flask(s) using the funnel
- Place the flask in running cold water and chill to 70 degrees
- I add my ice when the temp gets to about 100 degrees to get the last 30 degrees down quicker as I don’t have enough ice in our freezer to keep ice in the water the entire time
- While waiting for the wort to cool, sanitize the yeast vial, and the foam stopper
- When the wort is cooled, shake the yeast vial and then pour in it in the flask
- Note 1: If this is the 2+ step or a re-pitched slurry is being used jump to the instructions for starter steps 2+
- Make sure the stir bar is in the flask
- Place the foam stopper on it
- If you have a yeast stirrer place it on the stirrer now, otherwise give the flask several good swirls to get some air in
- Keep the flask at 70 degrees for 36 hours (still on the stirrer).
- After 36 hours place the flask in the fridge
Second & Third Steps
Depending on how much yeast is needed these steps may not be needed, but if so here is how to go about “stepping up” from the first step to the second.
- Create more wort, just like in the first phase all the way up to “Step Note 1”
- Decant the previous step, which is basically gently pouring out the top portion of the liquid
- Add a small amount of new wort to the flask and swirl it around to break up the yeast cake
- Add the remaining amount of new wort.
- If you will be splitting this to multiple containers, pour the flask back into the chilled bowl and stir really well to get the yeast evenly distrusted throughout the liquid
- Continue the steps after Note 1 in the First Step section
Storage
Good for 2 to 3 days when left at room temp, but since I always cold crash the starter I end up in the fridge. The starter should be good for at least 3-5 days in the fridge. Though, ideally, you should try to make the starter so that it is ready on brew day.
Yeast starter from dry yeast
My steps are directly from HowToBrew.com
Re-hydrating Dry Yeast
- Add 25mL of boiled water per 1g of yeast into a sanitized jar
- Stir in 1.25g of yeast nutrient per 1g of yeast
- Cool water/nutrient mix down to 95-105F (35-40C) and stir in the yeast.
- Cover with Saran Wrap and wait 15 minutes.
- Prepare the proof (sugar solution), by boiling 1 cup of water with one teaspoon of extract or sugar for 5 minutes
- Cool the sugar solution to less than 75 degF
- Add the solution to the yeast mixture
- Cover and place in a warm area out of direct sunlight for 30+ minutes
- After 30 minutes or so the yeast should be visibly churning and/or foaming, and is ready to pitch.
- Pitch or create starter as needed
Yeast Starter from Re-pitched Yeast
Follow the same instructions as the liquid yeast section using the exceptions where re-pitched yeast or slurry is called out.
Done with this page? Go back to the home brew page
