home brew

You are currently browsing articles tagged home brew.

Beer Name: Whenever Wit

Style:  Belgian Witbier

Alcohol: 4.31%

Color: 15

Recipe Source:  Midwest Belgian Witbier

This came out to be a pretty nice beer.  I didn’t do anything fancy (no secondary, no fining agents) and was pretty happy with the result.  I added a bit of fresh orange peel to give it a bit more zest though I’m not sure how much it added over the dried peel that came with the kit.  It has a nice hazy color and is well carbonated (if not too much).  If I were to do this again I’d reduce the coriander a bit as it is a bit strong for my tastes, but not so much that it ruins the beer.

My Brew Notes

Ingredients

  • 6 lbs wheat LME
  • 8 oz Carapils (30 min steep)
  • 1 oz Liberty hops (60 min)
  • 1 oz bitter orange peel (10 min)
  • 1 oz coriander (10 min)
  • 1oz sweet orange peel (10 min) added by me
  • 1 oz Hallertau (2 min)
  • Yeast: White Labs WLP400

Execution Notes

I didn’t do anything fancy for this beer and left it in the primary untouched the whole fermenting time (and a bit longer).

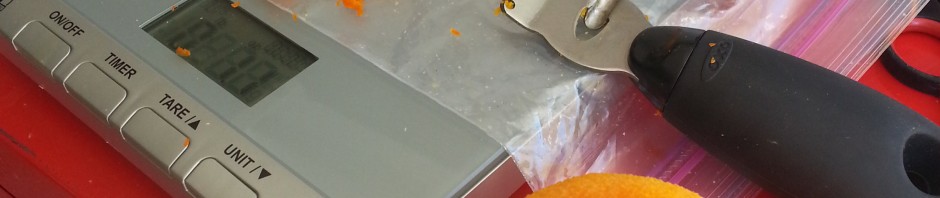
I did a bit more research of Witbiers and came across this post which suggests fresh orange peel.  So I added a bit of my own to the kit.

For what it's worth, Here's a quote from July/Aug 2007 BYO mag, Style profile (Witbier) by Jamil Zainasheff:

"The best way to add citrus character is with fresh citrus. The Petrified bits of orange peel often used may be authentic, but fres zest has a much brighter character. Select tangerines or oranges with a nice bold, fresh, aroma...Use a citrus zester to peel the very surface of the skin and avoid digging deep into the white pith as it is bitter and lacks citrus character. Measure the zest by weight, targeting about 1 to 2 ounces in a 5 gallon batch."

His recipe is in that article, as well. (calls for 1.5 oz of zest and .4 oz of crushed coriander.)

So I didn’t do the yeast start calculations correctly and subtracted 5 months instead of 4. This resulted with an over pitch but given that I hit my OG and FG right on everything worked out just fine.

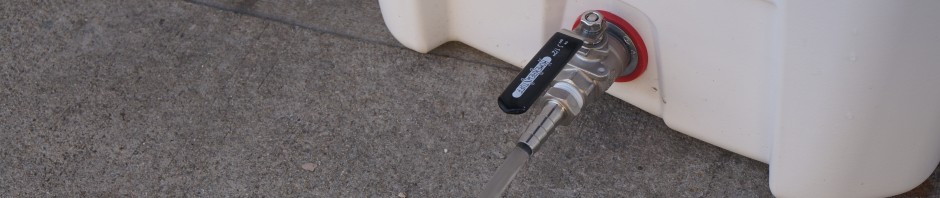
Also, I didn’t clean out my tubing right away on brew day.   Some of the hoses look stained now.  I’m not sure if they would have been if I’d cleaned everything right away, but I think they are still usable.

Finally, my fermentation could get down to cold crashing temperatures.  At one time it was iced over so I had to let the thaw out.  This was the first time it has ever iced up and after that either something broke in the A/C unit or just I’ve never tried to cold crash when it was this warm.  Either way my fermentation chamber could only get down to ~55 degF and that was with it running almost none stop.  I really hope it didn’t break.

Schedule

  • Brew day: 3/15/2014
  • Cold Crash Start: 4/22/2014
    • Broken fermentation chamber
  • Secondary Fermentation: N/A
  • Dry Hopping: N/A
  • Cold Crash 2: N/A
  • Gelatin (32): N/A
  • Bottling Prep: 4/27/2014
    • No early prep
  • Bottling: 4/27/2014

Alcohol

  • Target Starting Gravity: 1.042
  • Starting Gravity:  1.042
  • Target Final Gravity: 1.010
  • Final Gravity: 1.009
  • Alcohol %: 4.31

Color: 15

Recommendations for next time

Use less coriander.  This beer is a bit too spicy for my tastes. Still good, but I’d tone it down a bit as suggested in the same Witbier article mentioned above

For what it's worth, Here's a quote from July/Aug 2007 BYO mag, Style profile (Witbier) by Jamil Zainasheff:

As for the coriander, he says, "I gently crush the coriander with the back of a heavy spoon to expose the inside of the seeds, which gives it a fairly strong, spicy character versus whole seeds. The level of coriander is probably the area most brewers overshoot, resulting in a really peppery beer. The desired result is a gentle background spicing not an overwhelming one. If you have fairly fresh coriander, start with .4 oz per 5 gallon batch during the last 5min of boil."

Tags: , , , ,

I’ve finally completed my mash tun build, the last new tool I need for all grain brewing.  For my birthday, I got a 110qt Igloo Glider Roller cooler from Costco,  a ball valve kit, and a 12″ stainless steel water heater connector.  With this I will be able to brew the highest ABV beers (all the way up to 18%) in 10 gallon batches.  Which is perfect since I recently got new kettles and burners (see my other post on that) to do 10 gallon batches too.

With my new gear I’ll had to do was take out the coolers drain and then put in my own drain.  Well 8 hours later I’ve finally finished.  Apparently my cooler is thicker than most coolers so I had to get some additional parts.  With my new parts, a female to female (f2f) extension and a male to male extension,, both stainless steel, I had a setup that was too long and I had a leak out of the hole.  So I then hand cut the f2f extension on both sides to shorten it up.  Still this leaked.  I tried several other configurations with additional washers and they all had leaks.  Then when I was in DC I stopped at a My Local Home Brew Store  and got some help from some very friendly staff and purchased several O-rings, some heat resistant some not.  Well when I got home I still could screw things together without having an ever so slight leak.  Note, the leak on the outside was slow, which is bad, but I was also worried that it was leaking into the center of the cooler, even worse.  So then Chase and I made another trip to another hardware store and picked up some more washers and another pipe wrench.  With that final trip to the store I finally got a mash tun that didn’t leak.  Hallelujah! Oh, and it turns out I never needed to cut through any of the f2f extension, but it works just fine short too.

One final note, most coolers advertised size includes the lid and seems to not always add up correctly.  This cooler, Igloo Glide Roller Premium, is advertised as a 110qt cooler.  When you measure up to where the lid hits 13.5″ (which is needed to keep the heat in while mashing) and take out the bump in the inside this cooler ends up being about a 96qt cooler.  Still plenty big for 10G batches, but something to be mindful when selecting a cooler.

Tags: , , , , , , , , , , , ,

I created my mash paddle with some help from my father-in-law, Bob, to get me upgraded for all grain brewing. Bob gave me a very nice piece of Lenga (aka fireland cherry) wood from Chile to make the paddle out of. We were able to quickly cut out a paddle shape and drill out some holes one afternoon. Then in another afternoon I used a dremel and rounded out all the edges. Followed by some good old hand sanding with 60 and 200 grit sand paper. It isn’t the fanciest of paddles, but should work out for be great. Now I just need to get the MLT to stop leaking and I’ll be ready for my first batch of all grain brewing.

Tags: , , ,

Beer Name:  Falconer’s Success I2PA

Style:  Imperial IPA (Rouge XS Imperial IPA clone)

Alcohol: 7.78%

Color: 18

Recipe Source:  Austin Home Brew Supply, Extract

Well this is the first beer I’ve made that I’d say that I’m impressed with and say that it is a success.    My beers prior to this were okay, but not impressive and I always thought they were not just quite right.   This beer is clear, well carbonated, the hops aromas are amazing, and the taste is excellent.  It is the second beer since I made the fermentation chamber  and I’ve gotten better at the process in general, but either way I’ve happy with the outcome.  In fact I was so pleased with my beer that I had a stupid childish grin on my face that Lisa couldn’t help to notice when I had the first bottle.  At any rate this beer is my first true success!!!


My Brew Notes

Ingredients

I used the extract kit provided in the link above and added 1oz falconer’s flight hops added with the other dry hops.

Execution Notes

This was the first time ever and used my new flask.  I used 6.5oz DME to 1.8mL of water for the first step up.  I had a hard time pouring DME into flask and should pour water into measuring cup then back into flask.  I also had a major boil over and lost about 0.100mL.  For the second step up I used fermcap-S and have zero boil over!!  Water took longer to get to boiling since there was so much water stretching the time out more than it should in the future.

This batch went pretty well on brew day.  I didn’t do any of the pre-brew day tasks except for buy the ice and water and managed to do the rest while I was brewing without any delays between steps.  After about 10 mins into the boil I had to run to the restroom and somehow managed to have a boil over in that time.  I was concerned that I might have lost a lot of wort since I wasn’t there to witness the boil over, but after a few questions to the home brew forums I think I was able to determine what happened which caused me to miss my ABV by 0.66%.

The fermentation took off quite vigorously and foamed out of the bucket on the second day.    I noticed I had an issue when I saw a fruit fly buzz across the webcam.  I was afraid that when I opened the fermentation chamber that there were going to be flys and larva everywhere, but fortunately there was just the one fly.  This was a pretty sticky mess to clean up, but wasn’t too bad to wipe out of the chamber.  I cleaned out the airlock and let to do its thing

I used a secondary (cold crash prior to transfer) and gave it my first try at dry hopping.  I finished things off with gelatin and a cold crash prior to bottling.  I also tried something new this time when transferring to the bottleing bucket.  I placed the siphon in a fine nylon filter which I think helped keep out some of the muck.  I don’t know how affective this was, but it is simple to do and will add this to my normal routine.

Yeast: White Labs California Ale V WLP051

Schedule

  • Brew day: 1/4/2014
    • Boilover
    • Vigous fermentation mess
  • Cold Crash Start: 1/13/2014
  • Secondary Fermentation: 1/23/2014
  • Dry Hopping: 2/25/2014
  • Cold Crash 2: 3/3/2014
  • Gelatin (32): 3/4/2014
  • Bottling Prep: 3/7/2014
  • Bottling: 3/8/2014
    • nylon filter around siphon

Alcohol

  • Target Starting Gravity: 1.80
  • Starting Gravity:  1.077
  • Target Final Gravity: 1.020
  • Final Gravity: 1.022
  • Alcohol %: 7.78

Color: 18

Recommendations for next time

Watch the boil over.  I lost about 0.15G affecting the OG.

Tags: , , , , , ,

In a fortunate sighting on Craigslist, and a very understanding wife, I was able to get some “new to me” equipment for very very cheap to allow me to do all grain brewing for up to 10G batches.  The stuff could use some cleaning, but I got:

  • 24G stainless steel kettle with thermometer, sight tube, valve, and bazooka screen.
  • 16G stainless steel kettle with thermometer and valve.
  • 2 propane burners.
  • 6.5G glass carboy with top, thermometer tube, and 3 piece airlock.
  • 2000mL Erlenmeyer flask with stopper
  • homemade stir plate (no stir bar)


I had this great plan on how to do incremental upgrades from 5G extract brewing to 5G all grain brewing then to 10G all grain brewing, but this purchase basically jumps me right up to being able to do all grain brewing now!  I’m still going to do a couple of 5G batches to start so that I can figure out how to all grain brew and to understand my equipment a bit more, but stepping up to 10G batches will mean that I have/need/get to brew less and will have to do more fun things with Lisa and Chase.

Tags: , , , , ,

« Older entries § Newer entries »