Final Beer Name: Where’s the Bacon???
Style: Smoked Bacon Honey Porter
Alcohol: 6.49%
Color: 35
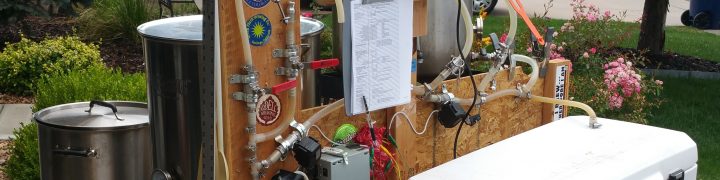
This is my first beer since making my fermentation chamber and using my improved process with a drill pump and paint mixer. Besides enjoying the beer I’ve had a lot of fun using my new toys and working on making better better.
The first sip was on new year’s eve which is a few days early for the 3 weeks in the bottle. The beer wasn’t very carbonated so I waited a few more weeks to 1/18/2014 see if it just needs more time or perhaps the bacon fat killed off my bubbles. Also, there appeared to be no bacon flavor which is kind of disappointing. I was really worried that it would be bacon-y so I’m much happier to err on this side of the line, but wish there was still a hint of bacon. I’m wondering if the flavors might come out a bit better after more time in the bottles.
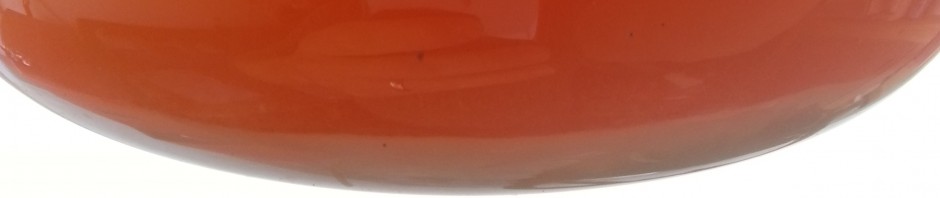
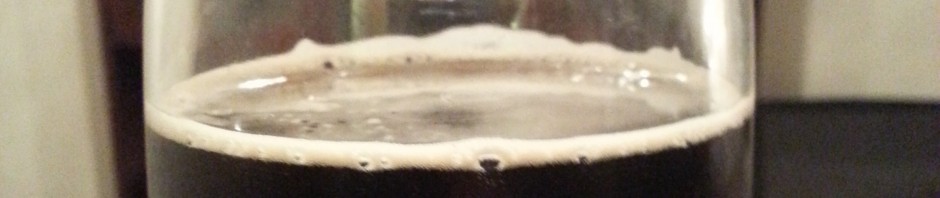
Well the final taste test still doesn’t have much/any bacon flavors or aromas, but that’s okay. The beer has a really smokey flavor with a nice smooth mouth feel. The beer seems very clear, which I’m not too surprised as there was almost no trub in the carboy after transferring to the bottling bucket. There isn’t too much carbonation, but enough to say it isn’t flat. I’m wondering if the bacon has impacted that, I’ve read the bacon fat can kill the bubbles.
My Brew Notes
Ingredients
This recipe is a specialty brewing kit plus a few of my add ons. The kit is from Midwest Brewing Supply and is a Honey porter extract brewing kit which includes (I forgot to take notes on the specifics:
- some specialty grains, maybe?
- Some extract
- Honey (30 mins)
- 1oz Kent Goldings hops (60min)
- 1oz Cascade hops (2 mins)
- priming sugar
then to get some smoke flavor I added
And for the bacon flavors I dry-hogged” as mentioned on BYO.com which suggests 5oz of bacon added like a normal dry hop schedule. To get there I started with
Execution Notes
Schedule
- Brew day (0) – 11/9/2013
- No boil over which is good.
- Fermenting didn’t start for about 36 hours. Worried that yeast didn’t take, but I did see bubbles before pitching it so it should have been fine. Will look to yeast starter going forward as recommended by boydster in other post
- Bubbles for quit after about 1.5 weeks. I was going to do a test but broke my hydrometer. I’ll probably update. my process to do hydro tests with the hydrometer attached to fishing line so that I don’t waste beer.
- No or really slow bubbles on day 11.
- waited a couple of days since I couldn’t do a hydro check for the moment.
- Cold Crash Start (13) – 11/22/2013
- Since the fermenting took longer than expected I delayed the cold crash a couple of days. Should look into taking measurements.
- It took about 1 day for the chamber to reach the cold crash temp. I changed the cold crash temp to ~40 so that the A/C wouldn’t turn on every 3 hours. Probably get it closer to 36 for the next crash
- Secondary Fermentation (16) – 11/25/2013
- The auto-siphon had a gap at the siphon to tubing. I’m pretty sure I exposed the beer to a lot of oxygen. Need to get some clamps before the next transfer.
- I left the chamber off for ~ 1 day for the beer to more naturally rise back to room temp. Near room temp I turned on the chamber which the heat pad did a bit of work for the last few degrees.
- Chamber set for 19.5 +/- 2.0.
- Dry “Hogging” (27) – 12/6/2013
- In reading about how to do the bacon it was clear that I needed to remove as much fat as possible so that the beer doesn’t stay flat. I’m not sure why, but apparently the fat will cause the beer to not hold the carbonation or something. So to do this I started with my 1lb of bacon and trimmed off as much fat as I could with a knife. Then I cooked the bacon in the oven on a rack that would allow for the grease to drip out. A few times while is was cooking and while flipping the bacon I used a paper towel to absorb the standing grease on the bacon. When it was all cooked my 1lb of bacon was about 3.5oz which was short of the 5oz I was targeting. With the bacon cooked I simply open up the carboy and dropped them in.
- Cold Crash 2 (31) – 12/10/2013
- Gelatin (32) – 12/11/2013
- Bottling Prep (35) – 12/14/2013
- Bottling (36) – 12/15/2013
- Very little trub in the carboy and I don’t think I sucked it up into the bottling bucket. I’m not sure if this is due to the gelatin (which I don’t really see at the bottom as much as I thought I would) or from doing the first cold crash.
- Bottled 22 220z bombers, and 11.5 12oz bottles for a total of 588.5oz (22*21+11.5*11).
- Set the fridge to 20+/- 2 for carbonating
- Took about 3 hours to bottle and clean up. Need to track times for other steps to better understand how long it takes to do things.
Alcohol
- Target Starting Gravity: 1.06
- Starting Gravity: 1.059
- Final Gravity: 1.011
- Alcohol %: 6.49
Color: 35
Recommendations for next time
- Look into using more bacon and/or stripping the bacon flavors out using vodka before brewing the beer
- Might use a little less smoke, Weyermann grains, by ~1/4lb to allow more of the honey flavor to show.