Beer Projects

Beer related projects such a new tools, equipment, or process

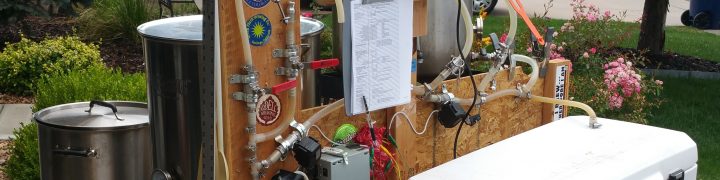
I’ve finally completed my mash tun build, the last new tool I need for all grain brewing.  For my birthday, I got a 110qt Igloo Glider Roller cooler from Costco,  a ball valve kit, and a 12″ stainless steel water heater connector.  With this I will be able to brew the highest ABV beers (all the way up to 18%) in 10 gallon batches.  Which is perfect since I recently got new kettles and burners (see my other post on that) to do 10 gallon batches too.

With my new gear I’ll had to do was take out the coolers drain and then put in my own drain.  Well 8 hours later I’ve finally finished.  Apparently my cooler is thicker than most coolers so I had to get some additional parts.  With my new parts, a female to female (f2f) extension and a male to male extension,, both stainless steel, I had a setup that was too long and I had a leak out of the hole.  So I then hand cut the f2f extension on both sides to shorten it up.  Still this leaked.  I tried several other configurations with additional washers and they all had leaks.  Then when I was in DC I stopped at a My Local Home Brew Store  and got some help from some very friendly staff and purchased several O-rings, some heat resistant some not.  Well when I got home I still could screw things together without having an ever so slight leak.  Note, the leak on the outside was slow, which is bad, but I was also worried that it was leaking into the center of the cooler, even worse.  So then Chase and I made another trip to another hardware store and picked up some more washers and another pipe wrench.  With that final trip to the store I finally got a mash tun that didn’t leak.  Hallelujah! Oh, and it turns out I never needed to cut through any of the f2f extension, but it works just fine short too.

One final note, most coolers advertised size includes the lid and seems to not always add up correctly.  This cooler, Igloo Glide Roller Premium, is advertised as a 110qt cooler.  When you measure up to where the lid hits 13.5″ (which is needed to keep the heat in while mashing) and take out the bump in the inside this cooler ends up being about a 96qt cooler.  Still plenty big for 10G batches, but something to be mindful when selecting a cooler.

Tags: , , , , , , , , , , , ,

I created my mash paddle with some help from my father-in-law, Bob, to get me upgraded for all grain brewing. Bob gave me a very nice piece of Lenga (aka fireland cherry) wood from Chile to make the paddle out of. We were able to quickly cut out a paddle shape and drill out some holes one afternoon. Then in another afternoon I used a dremel and rounded out all the edges. Followed by some good old hand sanding with 60 and 200 grit sand paper. It isn’t the fanciest of paddles, but should work out for be great. Now I just need to get the MLT to stop leaking and I’ll be ready for my first batch of all grain brewing.

Tags: , , ,

In a fortunate sighting on Craigslist, and a very understanding wife, I was able to get some “new to me” equipment for very very cheap to allow me to do all grain brewing for up to 10G batches.  The stuff could use some cleaning, but I got:

  • 24G stainless steel kettle with thermometer, sight tube, valve, and bazooka screen.
  • 16G stainless steel kettle with thermometer and valve.
  • 2 propane burners.
  • 6.5G glass carboy with top, thermometer tube, and 3 piece airlock.
  • 2000mL Erlenmeyer flask with stopper
  • homemade stir plate (no stir bar)


I had this great plan on how to do incremental upgrades from 5G extract brewing to 5G all grain brewing then to 10G all grain brewing, but this purchase basically jumps me right up to being able to do all grain brewing now!  I’m still going to do a couple of 5G batches to start so that I can figure out how to all grain brew and to understand my equipment a bit more, but stepping up to 10G batches will mean that I have/need/get to brew less and will have to do more fun things with Lisa and Chase.

Tags: , , , , ,

I’m getting ready to make the leap into all grain brewing and am pretty excited, but I want to do it right.  I don’t want to buy things to turn around a few batches down the road and wish I had bought something else.  So I want to either make sure the things I buy now will work for future upgrades.  A couple of key things to keep in mind is that I am doing 5 gallon batches now, but might want to do 10 gallon batches in the future.  Also, I like high gravity brews which requires more grain to get the more sugars, so again I need to think about the volume capability of the upgrades.

Key Items for all grain brewing

  • Hot Liquid Tank – HLT
  • Propane or Electric Burner
  • Mash/Lauder Tun – MLT
  • Mash Paddle
  • Kettle / brew pot

To get into all grain brewing from what I have now (see my tools here) I will need to get a mash/lauder tun (MLT), a mash paddle, and a large kettle.  I’ll explain my logic as I go through each one.

Hot Liquid Tank – HLT

A HLT is a fancy brewers way of saying a pot or kettle for heating water.  The hot water here will go into the MLT.  I have an existing 5G stainless steel pot which will be sufficient for 5G batches.  For 10G batches I’ll need a large pot, but my plan will be to buy a larger pot when time comes for this.  At the very least I’m not buying something now that won’t be used later.

Propane or Electric Burner

I have an existing 38,000 BTU burner from the turkey fryer kit I bought to get into home brewing.  From my calculations my burner should be good for batches up to ….TBD

To eventually do a 10G batch I have calculated that I’ll need about a TBD burner.

Mash/Luader Tun

Since a MLT isn’t needed for extract brewing I don’t have any existing equipment and will have to buy something new.  Seems like when someone gets into a really fancy brewing setup the MLT is a stainless steel pot, but many successful and far cheaper options use a converted cooled as they can easily be converted into an MLT and are fairly inexpensive.  Additionally, MLTs can be made for fly sparging or batch sparging.  I’m going to plan to do batch sparging as it seems this is relatively foolproof and the advantages for fly sparging aren’t too great.   I want to be sure that the MLT that I end up with will be good for 5G batches now and 10G batches in the future.

A high gravity (barleywine) 10G batch will have 45lbs amount of grain and at most 27.25  gal of water in the MLT at one time.   Remember the space in lid usually counts as part of the volume for a cooler so plan for a slightly larger cooler.  From this I get a cooler size with at least 94qt of internal space.   Well a 100qt coleman extreme cooler is going to only have about 80.25qt of internal space, but I figure I won’t be making any 10G batches of barelywine and will call it good.  Also, many poeple have recommended that a 70 qt (17.5G) is good for up to 10G batches.  The coleman extreme cooler comes highly recommended since it has a drain groove through the bottom.  With this cooler in mind a 5G batch will have a volume of 18 qt.    So with that in mind a 70-100qt cooler should be good into the future.

So I received a 100qt coleman extereme cooler for my birthday, but I have some questions about it as it isn’t as I thought it would be.  Read more on the Home Brew Talk Forums.

Mash Paddle

I’ll need a mash paddle.  I’ve read to use a hardwoord such as maple makes a good paddle.  Also, when making the paddle drill/cut good size holes in it to break up the dough balls well.

Kettle Upgrade

As I mentioned below I’m planning to use my existing kettle 7.5G kettle to become my HLT and then will purchase a new kettle.  Since I want to to small brewing upgrades without having to discard things in the future I’m planning to buy a kettle that will work for 5G and 10G batches, but to save money now I’m going to pass on any of the extra gizmos (thermometers, valves, sight tubes) for now.

Other posts suggest that a 80 qt (20G) stainless steel pot/kettle can do 10G batches.

In my quest to selecting a kettle I asked for some help with the selection criteria on homebrewtalk.com forums (here).


Tags: , , , , , , , , , , , ,

homebrewtalk.com forum

As with many posts I’m working to step up to all grain brewing, but I don’t want to have to do this again in a year so I’m trying to figure out the right criteria for selecting a kettle. I really don’t want to think in a year from now, “If only I had known …. before I bought my kettle”.

From what I’ve read here is my starting point
1) Choose stainless steel:

as opposed to aluminum which will pot over time

2) Choose 20G or greater kettle size:

I’d like to be able to do 10G batches if my heart desires. A 20G kettle will allow for high gravity 10G batches, smaller kettles will make things moer challenging. also, this eliminate the frequently suggested keggle idea as this is only a 15.5G kettle.

3) Can live without built in valves for now, but can upgrade late if desired:

I’m brewing without valves with no problems. I know valves will most likley make things easier, but it isn’t a firm requirement. Additionally, and perhaps more importantly its possible to punch/cut/drill holes and add valves at a later time, if/when desired

Open questions
4) Does 1-3 sound right, particularly #3?

I’ve read a lot of forums and such so far to get here, but I’m new to this and from what I’ve learned from doing extracts is that there is a lot to thing about when.

5) Does base thickness matter?

Seems like there are ranges from 1mm to 5mm. With most hovering around 2mm. I’m guessing this is for even heat distribution, but how much is enough

6) Does side thickness matter?

ranges from not specified to 1mm to 2.5mm. Seems like just about anything would work. Any issues with punching holes on a thin one later to add valves?

7) Need to be NSF certified?

Some claim to be, many don’t specify

8) build construction/materl

I’m not too familiar with the things I’ve seen a) aluminum wrapped/sandwhiched in stainless steel, b) 20 gauge stainless steel, c) 18/10 Stainless Steel, d) 18/10 T304 stainless steel, e) 3-Ply Bottom, and many more

9) Anything else?

I’m probably way over thinking this as I’ve seen posts from many happy brewers with pretty much all the pots I’ve taken a look at, but I haven’t been able to find any criteria for choose a kettle other than size recommendations. thanks for any feedback.

All Grain Kettle/Pot Quality Criteria

« Older entries § Newer entries »